Throwback ThursdayHey guys! Taking back to when I rehabed a $40 kitchen table and chairs from craigslist. I was finishing up my last semester at OSU and still living with mom and dad ready to move out. I had lived on my own before but this was a fresh start. I had only a bed and dresser to my name and desperately needed furniture for my new place. Working with a very tight budget I took to craigslist! Finding a local family who was getting rid of everything to start new in Texas I took the opportunity to take the kitchen set that had seen one too many thanksgiving fights and decided I could make it work!  At the time I didn't think to take a before picture so this is the closest thing I have. The bottom half of the table top is the original table color. When I purchased this table I wasnt sure that the table top and the material that is used for the chairs would hold up to what I expected them to do. Through trial and error I think they turned out great! I used an electric sander and sanded down all edges of the table top, base, and chairs. This by far was much more time consuming and bicep using that I imagined. After days of sanding (Even with the electric sander!) I was finally down to the "wood". For this set I was really only conserned with the table top looking like wood since the rest of it was going to be painted. 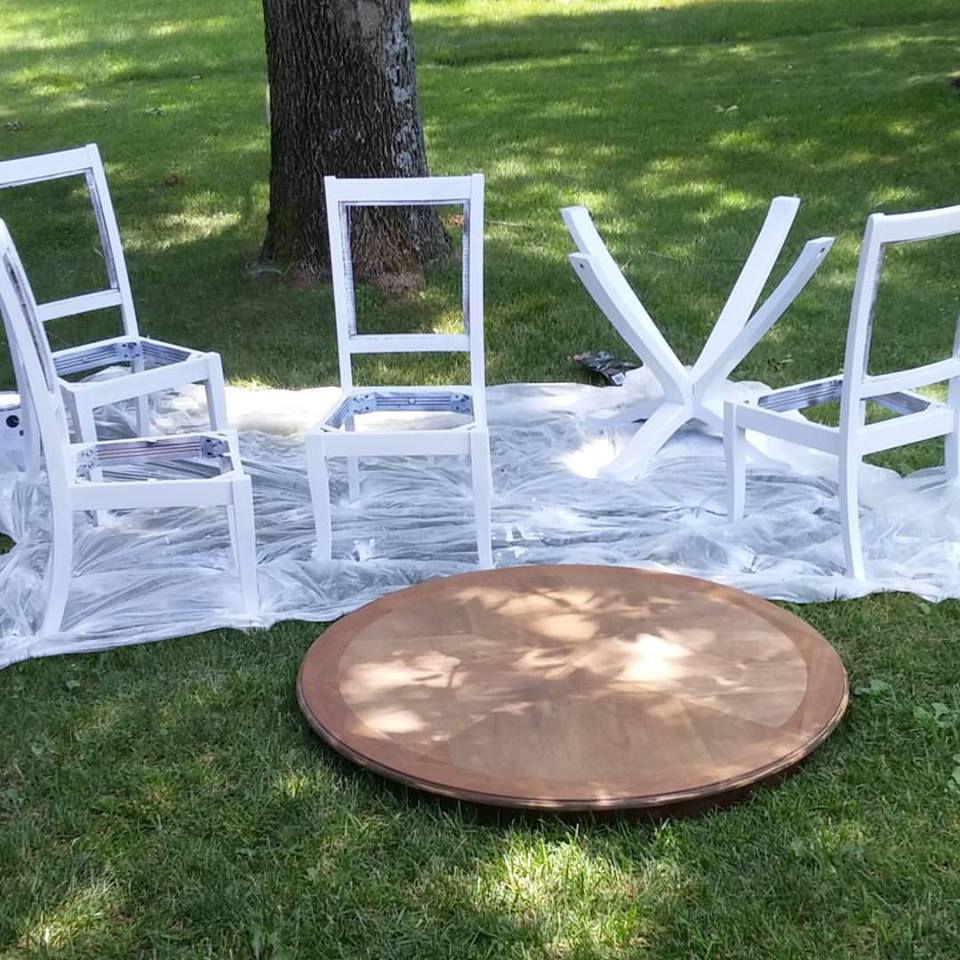 For the base and the chairs I used Rustoleum Primer spray paint to coat the surface. This required me to do this part outside. Shout out to my parents for letting me use their grass and not realizing I should have put down a tarp for this part! After coating the chairs and base with the primer I went to work on hand painting with Behr Premium Plus Ultra Pure White Hi-Gloss Enamel Interior/Exterior Paint. Knowing this paint was going to be used for multiple projects at the time I was willing to splurge a little on the paint and stain. Once all the chairs and base were completely painted I was with much hesitation ready to tackle the table top. I had never stained a thing in my life but I have watched plenty of DIY, HGTV shows to know how its done. I used the Minwax Early American stain, with fingers crossed that this material would hold a stain. I should preface this with, I have no idea what material the table and chairs are but they are not wood from a tree. I am pretty confident it is some kind of manufactured material that is able to hold a grain to look like wood but durable and cheap to be made in Thailand. With my eyes closed, no gloves (yep, made that mistake) I dipped my white rag into the stain and applied it to the top. To my suprise it worked! The stain sunk into the poris surface and instantly made it so much better! I did apply two coats of this stain to create the final piece and ran into a problem with the edge. Since this table is not made of wood the edge does not act like the top grain like surface. I tried staining it and it looked awful. You can kinda see this in the above photo. It just did not match the top like I was hoping so it was time to get creative. Protecting my newly stained top. I used the blue painters tape and oulined the grained parted of the table and decided to paint the edge like the base and chairs. Using a paintbrush and the same white paint I hand painted the edge and under ledge of the table top. This turned out super cute! I love it! I showed my parents my hard work, when pointing out the obvious my mom says "can you eat on it?" What a great question huh?! I clearly had not thought through what it would be like to eat on a stained table that had not been protected in any way. Back to Home Depot I went. Polyurethane is a life saver! I took the advice of my local HD experts and sealed the table top with Minwax Satin Fast-Drying Polyurethane. I used a poly brush that I knew I would end up throwing away at the end of the project. Applying the poly with the grain I coated the table top twice. 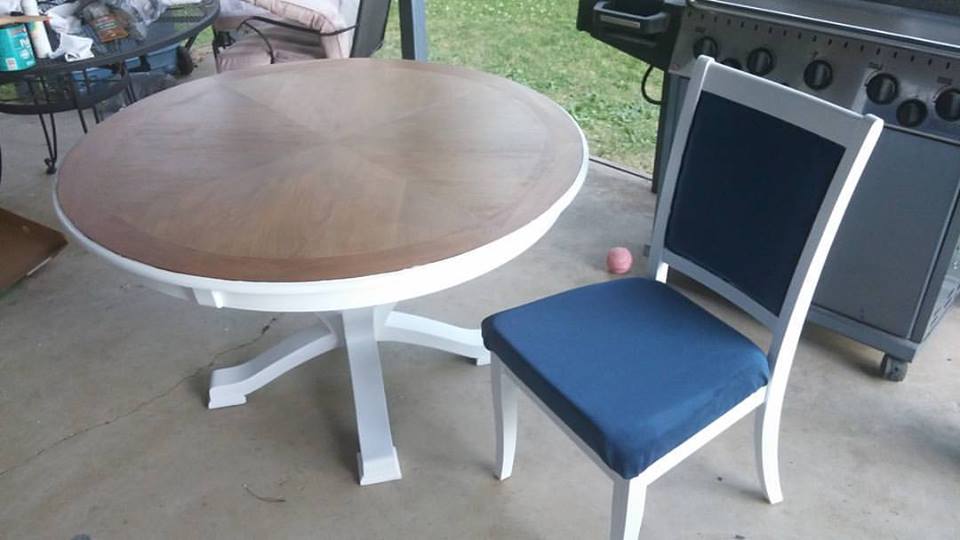 Completing the table was very satisfying and then it was on to completing the chairs! I had the base completed but I had to figure out how to take the very worn brown leather to a whole nother level. Ripping off the old fabric and padding I started with the bare bones of these chairs. Finding the cushion foam and amazing fabric at Joanns, I knew these chairs would look great!.  Using my staple gun I sandwhiched the foam between the two pieces of blue suede. I cut the fabric larger that the chair and stabled the back first. Then adding the foam and top piece to stable. This created a straight back to the chair and a cushioned look to the front of the chair. For the seat I used the old wood base and added new foam. Flipping the seat over and stapling the fabric to the bottom. I used a technique similar to fellow blogger The house might be bigger than the three of us. I will say that when taking off the old fabric it left little wood to work with for the back, I ended up having to staple some of the fabric to the edges of the chair frame versus the wood that was provided. This created some very ugly spot of staples, foam, and excess fabric. Using a tiny pair of scissors I was able to get close but not close enough for what I would have liked.  Knowing that the staples weren not the most attactive thing to look at, I took to Pinterest to find a solution. While nailheads would have looked super cute I couldn't afford or had the patients to put in that much more work. Using inspiration from Pinterest and the selection of trimings provided by my local Joann Fabrics I settled on this navy blue braided trim. The hard part was figuring out how I was going to attach it to the chair to make the staples disappear clearly staples were not an option. Hot glue gun to the rescue! Using the small head craft glue gun I was able to add this decorative detail to the chairs to complete my overzealous project! Looking back to this project I had no idea how big of a project it actually turned out to be! In my head I thought this would be a 2 day project at most and would be cheaper than buying a new set of table and chairs. I was exactly right. It took about 3 weeks to complete in total from purchase to complete (I also work full time) and it took about $200 to complete. I love the final product and I think for the finished set its totally worth more than I put in it! I get compliments from friends and family that come to visit. It has been a beautiful addition to my cute little apartment (Teaser! on a future post!)  ~ Brie
0 Comments
Leave a Reply. |
AuthorBrigette - The ever-loving organized crafter. ArchivesCategories
All
|

 RSS Feed
